Disclosure: We may earn a commission when you buy through links on this page, at no extra cost to you. We buy nothing, sell nothing and accept no payment for coverage — commissions never decide what we recommend. How we make money.
For lower back tightness, begin with a gentle 10–15 minute massage chair routine: partial recline, low roller intensity, lumbar heat if it feels comfortable, and a slow program that covers the waist-to-hip area. If one spot feels especially tense, use spot massage for 30–60 seconds at a time, then shift the rollers slightly instead of holding pressure in one place too long.
The goal is comfort, not force. A massage chair is a consumer wellness product, so choose settings that feel relaxing and controlled, and stop if you feel sharp discomfort, numbness, dizziness, or symptoms that concern you.
Start With a 10–15 Minute Lower Back Routine
A good first routine is short, predictable, and easy to adjust: 10 to 15 minutes, low intensity, moderate recline, and focused coverage from just above the beltline down toward the upper hips. Longer is not automatically better, especially when you are trying a chair, a new body position, or a stronger roller style for the first time.
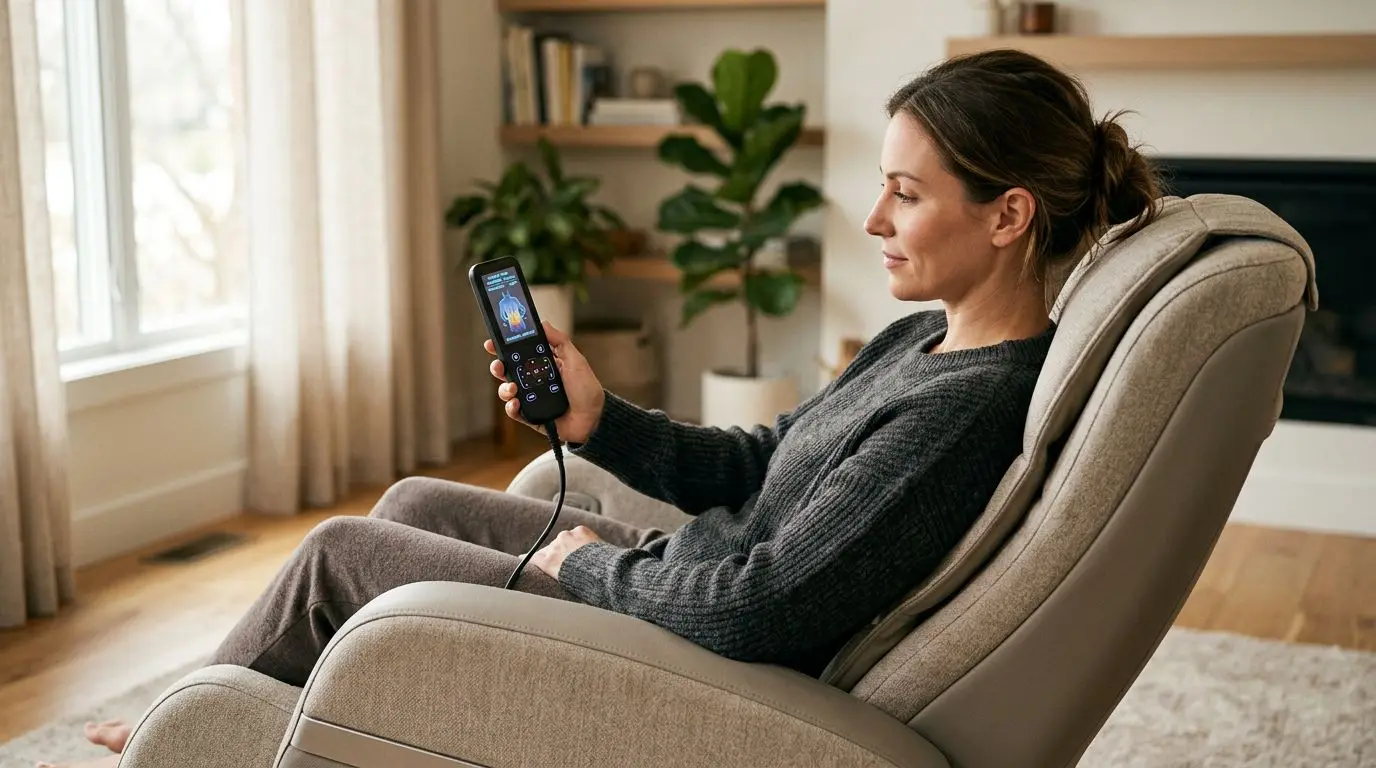
Set the chair to a gentle whole-back or lower-back program if one is available. If the remote offers a manual mode, choose a slow kneading or rolling motion instead of the strongest tapping or percussion option. The first 2 minutes should feel like a warm-up. You should be able to breathe normally, relax your shoulders, and keep your hips settled in the seat without bracing.
Use the following simple sequence as a starting point:
- Minutes 0–2: Sit upright or slightly reclined while the chair scans your back, if scanning is available.
- Minutes 2–5: Recline to a comfortable angle and use low intensity over the full back or lower back.
- Minutes 5–10: Add lumbar heat if it feels pleasant, and narrow the roller range toward the lower back.
- Minutes 10–12: Try spot massage for 30–60 seconds on one tight-feeling area, then move slightly.
- Minutes 12–15: Return to a gentler rolling or kneading mode before sitting upright slowly.
If your chair has preset programs only, choose the mildest one that spends time around the lumbar area. Skip any mode that feels too forceful right away. A chair session should feel like steady pressure and movement, not a test of pain tolerance.
Use Recline First: Try 100–130 Degrees Before Going Deeper
Recline changes how much body weight rests against the rollers. For many users, the lower back feels more comfortable at a partial recline, roughly 100 to 130 degrees from the seat base, before moving into a deeper zero gravity-style position. If you fully recline right away, the rollers may feel more intense because your back presses more firmly into the chair.
Start with a modest angle. Your head and torso should be supported, your knees should not feel jammed upward, and your pelvis should stay level instead of sliding forward. If the chair includes a leg rest, raise it enough to support your legs without pulling your hips out of position. A small adjustment can matter; even 2 or 3 inches of leg-rest position can change how your low back meets the rollers.
Deeper recline can be useful when you want broader contact through the back and seat, but it is not the best first setting for everyone. If your lower back feels compressed, reduce the recline. If the rollers seem to miss the curve above your hips, recline a little more and let the chair rescan if it offers that option.
Use this quick guide:
| Recline position | What it usually feels like | Try it when |
|---|---|---|
| Upright to slight recline, about 95–105 degrees | Lighter roller contact and easier exits | You are new to the chair or want mild pressure |
| Moderate recline, about 110–130 degrees | Balanced contact through mid and lower back | You want a first lower-back routine |
| Deep recline or zero gravity-style position | Stronger roller contact from more body weight | You already know low intensity feels comfortable |
Sit up slowly after any reclined session. Give yourself 15 to 30 seconds before standing, especially if you have been lying back with heat on.
Add Lumbar Heat Carefully: 5–10 Minutes Is Enough at First
Lumbar heat is designed to feel warm and soothing around the lower back, usually through heating pads placed near the waist area. It does not need to feel hot to be useful as a comfort feature. For a first routine, try 5 to 10 minutes of heat instead of leaving it on for a full long session.
Turn heat on after the first few minutes, once you know the roller pressure is comfortable. This makes it easier to judge each setting separately. If you activate heat, deep recline, air compression, and a strong roller mode all at once, you may not know which feature is making the session feel better or worse.
Wear normal indoor clothing, not thick outerwear that blocks sensation and not bare skin against heated surfaces. Check how the heat feels after 2 minutes. Warm is fine. Burning, stinging, or prickly heat is not.
Be extra careful with heat if you have reduced sensation, neuropathy, diabetes-related sensation changes, or any condition that makes it harder to judge temperature. If you are pregnant, have a pacemaker or other implanted cardiac device, a history of blood clots, take anticoagulants, have osteoporosis, a recent fracture or surgery, spinal disc problems, neuropathy, or uncontrolled hypertension, ask your physician before using a massage chair or heat feature. That is not fine print; it is practical safety guidance.
If you are unsure, use the rollers without heat. A lower-back routine can still feel comfortable with positioning, low intensity, and careful roller placement.
Set the Roller Position 1–3 Inches Above the Beltline
For many people, the most useful lower-back roller zone starts about 1 to 3 inches above the beltline and continues down toward the top of the hips, depending on the chair track and your body height. The exact location will vary because chairs scan differently, bodies sit differently, and tracks do not all reach the same areas.
If your chair has body scanning, sit all the way back before the scan begins. Keep your shoulders relaxed and your hips square in the seat. A scan can misread your position if you lean to one side, sit on a cushion, or shift forward during setup.
After the scan, use the remote arrows to move the rollers manually. Make small adjustments. One tap on a remote may move the rollers only a short distance, but that can be enough when working near the lower back. Aim for broad, comfortable contact on the muscles beside the spine, not direct pressure that feels sharp on the spine itself.
Track design also matters. An S-track generally follows the curve of the back and often stops around the lower back. An L-track or SL-track continues under the seat, adding glute and upper hamstring coverage in many chairs. That seat-track extension can change how the lower back feels because the rollers may move through the hip area rather than stopping at the waist.
| Track type | Typical coverage | Lower-back routine note |
|---|---|---|
| S-track | Neck to lower back | Often works well for focused back-only routines |
| L-track | Back plus seat area | Can extend pressure below the beltline into the glutes |
| SL-track | Curved back path with seat extension | Often gives broader waist-to-hip coverage |
If the rollers feel too low, move them up before increasing intensity. If they feel too high, recline slightly more or move the roller zone down in manual mode. Small changes beat big jumps.
Use Spot Massage in 30–60 Second Intervals
Spot massage can be useful when one area feels especially tight, but it is easy to overdo. Start with 30 to 60 seconds on a single spot, then move the rollers up or down slightly. Avoid parking the rollers on one exact point for several minutes.
Choose a gentle motion first. Slow kneading usually feels more controlled than hard tapping. If your chair offers width adjustment, use a medium width so the rollers work beside the spine instead of pressing narrowly into the center. If it offers speed control, choose the slower option for the first pass.
A practical method is to make a small map of the lower back: left side, center-adjacent area, right side, and upper hip line. Spend less than 1 minute on each area. If one side feels more sensitive, use less intensity there rather than trying to make both sides feel identical.
Spot massage should feel like localized pressure with movement. Stop that part of the routine if you feel pinching, electric sensations, numbness, or discomfort that radiates away from the contact point. Those are not signs that you need a stronger setting. They are signs to stop and reassess.
After spot work, finish with 2 to 3 minutes of gentle rolling over a wider area. That keeps the session from ending on the most intense setting and gives you a better read on how your back feels when the rollers move broadly again.
Choose Gentle Intensity: Level 1–2 Before Level 3 or Higher
If your massage chair has 5 intensity levels, start at level 1 or 2 for lower-back tightness. If it has 3 levels, start at the lowest. If intensity is controlled by a removable back pad or cushion instead of a number, leave the padding in place for the first session.
Lower-back pressure can feel stronger than upper-back pressure because of posture, body weight, and how the pelvis sits in the chair. A setting that feels mild between the shoulder blades may feel much stronger near the waist. That is why a cautious first pass is smarter than jumping straight to deep pressure.
Different roller technologies also feel different. Two-dimensional rollers typically move up, down, and side to side. Three-dimensional rollers can also move in and out, changing depth. Four-dimensional designs usually add more variation in rhythm or speed. Those labels are not a guarantee of comfort; they simply describe common ways chairs create pressure and movement.
| Feature | Gentle starting setting | Why it matters for the lower back |
|---|---|---|
| Roller intensity | Level 1–2 of 5 | Reduces the chance of harsh pressure at the waist |
| Roller width | Medium or wide | Keeps pressure beside the spine rather than too narrow |
| Roller speed | Slow | Makes contact easier to track and adjust |
| Air compression | Low or off | Prevents the hips and legs from feeling pinned in place |
| Heat | 5–10 minutes | Adds warmth without overcomplicating the first routine |
Air compression can be pleasant, but for a lower-back troubleshooting routine, consider turning strong hip, thigh, or calf compression off at first. If the airbags hold you tightly in position, it may be harder to shift your pelvis or reduce pressure quickly.
Who This 15-Minute Routine Is Best For
This routine is best for adults who want a gentle, comfort-focused way to use a massage chair when the lower back feels stiff after sitting, standing, travel, or routine daily activity. It is especially useful for someone testing a chair for the first time, returning after a break, or learning which settings feel best around the lumbar area.
It is also a good starting point if you share a chair with other people. One person may like a deep recline and stronger rollers, while another may prefer upright positioning and heat only. A 15-minute low-intensity routine gives each user a baseline before customizing.
This routine is not a substitute for professional medical advice. Do not use a massage chair to evaluate or address new, severe, unexplained, or worsening symptoms. Ask a physician before use if you are pregnant; have a pacemaker or other implanted cardiac device; have blood clots or take anticoagulants; have osteoporosis; recently had a fracture, surgery, or significant injury; have spinal disc problems, neuropathy, or uncontrolled hypertension; or have been told to avoid mechanical pressure, heat, or strong vibration.
One more practical note: body size and chair fit matter. If your shoulders do not sit near the backrest, your feet cannot rest comfortably, or your hips are squeezed by the seat, the lower-back rollers may not land where intended. Fit problems can make even gentle settings feel wrong.
How to Choose and Measure Your Settings in 3 Checks
Before saving a favorite lower-back routine, do 3 quick checks: body position, roller location, and pressure level. This takes about 2 minutes and prevents most common comfort problems.
1. Check your seated position
Sit with your hips all the way back, shoulders touching the backrest, and feet supported. If the chair has a footrest length adjustment, set it so your knees are comfortably bent rather than locked straight. If your hips slide forward more than 1 inch during recline, reduce the angle or adjust the leg rest.
2. Check the roller landing zone
Use the remote to bring the rollers to the lower back. A useful first target is the area just above the pelvis, often 1 to 3 inches above the beltline. The pressure should be on the soft tissue beside the spine, not directly on bony points.
3. Check intensity before adding features
Run the rollers for 60 seconds at the lowest setting before adding heat, air compression, or spot massage. If you would describe the pressure as more than a 6 out of 10, reduce intensity, add padding if available, sit more upright, or choose a gentler mode.
Keep notes for the first few sessions. You do not need a complicated log; write down recline angle, heat on or off, intensity level, and the program name if your chair uses generic program labels. After 3 sessions, you will usually see a pattern in what feels comfortable.
Common Lower-Back Setting Mistakes to Avoid in the First 20 Minutes
The biggest mistake is stacking too many intense settings at once: deep recline, high roller depth, narrow width, strong air compression, and heat. If the session feels too aggressive, you will not know which setting caused it. Change one variable at a time and test it for at least 60 seconds.
A second mistake is chasing the tightest-feeling spot with more pressure. Localized intensity can feel satisfying for a moment, but the lower back often responds better to broader, slower contact in a chair setting. Use spot massage briefly, then return to a wider roller path.
A third mistake is ignoring chair fit. A tall user may need the rollers moved lower after a scan, while a shorter user may need extra attention to shoulder and hip placement. If the chair allows shoulder height adjustment, set it before starting the lower-back portion. If it does not, use manual roller controls after the scan.
Finally, do not use the chair when you feel unwell, unusually sensitive, or unsure about a medical concern. Stop immediately if the session creates sharp discomfort, numbness, tingling, dizziness, or any sensation that feels wrong for your body. Comfort settings are personal, and backing off is a valid adjustment.
A Simple 3-Day Plan to Find Your Best Settings
Use a short 3-day test to identify your preferred lower-back settings without overdoing it. Keep each session to 10 to 15 minutes and leave at least several hours between sessions. The purpose is comparison, not endurance.
Day 1: Use the mildest lower-back or whole-back program. Moderate recline, no spot massage, heat off for the first half, and intensity level 1 or 2. Notice where the rollers land.
Day 2: Repeat the same routine, but add lumbar heat for 5 to 10 minutes if it felt appropriate on Day 1. Keep the roller intensity the same so you can judge the heat separately.
Day 3: Add brief spot massage. Use 30 to 60 seconds on one or two lower-back areas, then return to a gentle rolling mode. If spot massage feels too concentrated, skip it and use a wider roller path instead.
At the end of 3 sessions, choose the routine that felt most comfortable during and after use. Save it as a favorite if your chair allows custom memory settings. If it does not, keep a note near the chair with the recline position, heat choice, intensity, and roller mode.
Frequently asked questions
What massage chair setting should I try first for lower back tightness? +
Start with a 10–15 minute gentle routine using low roller intensity, moderate recline, and a lower-back or whole-back program. Add lumbar heat only after the pressure feels comfortable.
How long should I use spot massage on my lower back? +
Use spot massage for 30–60 seconds on one area, then move the rollers slightly. Avoid holding firm pressure on the exact same point for several minutes.
Is zero gravity better for the lower back? +
A deeper zero gravity-style recline can increase roller contact, but it may also feel stronger. Try a moderate recline first, around 110–130 degrees, before going deeper.
Should I use lumbar heat every time? +
Not necessarily. Try heat for 5–10 minutes only if it feels pleasantly warm. Skip heat if you have reduced temperature sensation or if your physician has advised you to avoid heat.
When should I ask a physician before using a massage chair? +
Ask your physician before use if you are pregnant; have a pacemaker or implanted cardiac device; have blood clots or take anticoagulants; have osteoporosis, recent fracture or surgery, spinal disc problems, neuropathy, or uncontrolled hypertension.
Related guides
How to Use a Massage Chair for Lower Back Tightness
13 min read
How to Adjust Massage Chair Intensity Without Overdoing It
13 min read
Best Massage Chair Settings for Beginners: Intensity, Roller Position, Air Pressure, Heat, and Recline
13 min read
How to Use a Massage Chair at Home: A Simple First-Week Routine for Comfort and Consistency
10 min read
Massage Chair Auto Programs Explained: Relax, Stretch, Recovery, Sleep, and Deep Tissue Modes
14 min read