Disclosure: We may earn a commission when you buy through links on this page, at no extra cost to you. We buy nothing, sell nothing and accept no payment for coverage — commissions never decide what we recommend. How we make money.
Manual and spot massage modes let you move beyond automatic programs by placing the rollers where you want more focused contact and controlling how long they stay there. For best results, position the rollers carefully, keep one spot to about 30 seconds to 2 minutes, and adjust pressure so it feels firm but not sharp or painful.
Think of these modes as precision controls, not an invitation to max out intensity. A good session usually comes from small changes: moving the rollers an inch or two, changing the recline angle, adding or removing air compression, and stopping before the area feels overworked.
Manual vs. spot modes: what changes in the first 30 seconds
Most massage chairs offer automatic programs that follow a preset routine, often lasting 10 to 20 minutes. Manual mode gives you more control over roller style, roller location, speed, width, and sometimes the track zone. Spot mode is narrower: it parks the rollers at a specific point or in a very small area so you can focus contact on one section of your back, shoulders, or hips.
The key difference is movement. In manual mode, you may choose a zone such as upper back, lower back, or full back, while the rollers continue traveling within that selected area. In spot mode, the rollers usually stay nearly fixed, moving just enough to knead, tap, or press around one position.
| Mode | What it does | Best use | Typical time per area |
|---|---|---|---|
| Auto program | Runs a preset sequence across larger zones | General full-body comfort | 10–20 minutes total |
| Manual mode | Lets you choose roller motion, zone, width, and speed when available | Customizing pressure and coverage | 3–8 minutes per zone |
| Spot mode | Holds the rollers at or near one location | Focused contact on one tight-feeling area | 30 seconds–2 minutes per spot |
If you are new to these controls, start with manual mode before spot mode. It is easier to learn how your chair’s rollers feel while they are moving through a small zone than when they stay in one exact place.
Who it’s best for—and who should ask a physician first within 24 hours of concern
Manual and spot modes are best for people who already know which areas feel tense after daily activities: the base of the neck after desk work, the mid-back after driving, or the low back after standing for several hours. They are also useful in households with different preferences, because one person can choose a wider, gentler roller path while another prefers firmer contact in a smaller area.
These controls are not for pushing through pain. A massage chair is a consumer wellness product, not a medical device, and it should not replace professional care. If you have new, severe, unexplained, or worsening pain, skip the chair and speak with a qualified clinician.
Who may benefit from the extra control
- People who find full auto programs too broad or too repetitive.
- Users who want to spend 1 to 2 minutes on a specific area instead of a whole 15-minute routine.
- Households where users differ by height, body shape, or pressure preference.
- People who want a gentler session by reducing roller range, speed, or recline.
- Experienced users who understand the difference between firm pressure and discomfort.
Safety situations where you should ask your physician first
Ask your physician before using focused manual or spot settings if you are pregnant; have a pacemaker or other implanted cardiac device; have a history of blood clots or take anticoagulant medication; have osteoporosis; recently had a fracture, surgery, or significant injury; have spinal disc problems; have neuropathy or reduced sensation; or have uncontrolled hypertension. These situations can affect what kind of pressure, heat, vibration, or compression is appropriate for you.
Be careful with any area where sensation is reduced. If you cannot clearly feel pressure, heat, or discomfort, it is easier to overdo a spot without realizing it.
How to position the rollers within 1 to 2 inches of the right area
Good targeting starts with body position. Sit fully back in the chair, place your feet where the ottoman or footrest naturally supports them, and let the body scan finish if your chair uses one. Body scans are not perfect, but they help the rollers estimate shoulder height and back length before you take manual control.
Once the scan is complete, use the up and down roller controls slowly. A one-second button press may move the rollers about an inch or more, depending on the chair. Stop when the roller contact is close to the area you want, then make small adjustments instead of holding the button down continuously.
A simple positioning method
- Start with a low intensity setting. Use the gentlest roller strength available for the first pass.
- Choose a broad manual zone. Upper back, mid-back, or lower back is easier to manage than a fixed spot at first.
- Move the rollers near the area. Aim for within 1 to 2 inches, not perfect placement.
- Let the rollers pass once or twice. Notice whether the pressure feels centered or slightly high, low, left, or right.
- Adjust your posture before the remote. Sliding your shoulders back, sitting taller, or slightly changing recline may improve contact.
- Switch to spot mode only after placement feels right. Then use a short timer.
Roller location can change when you recline. If you move from upright to a deeper zero-gravity-style position, recheck the contact point before staying in spot mode. Even a small change in hip angle can shift how the rollers meet your back.
How long to stay on one area: use 30 seconds to 2 minutes
More time is not automatically better. Focused roller contact can feel useful at first, then become too intense if it remains in one place. A practical limit is 30 seconds to 2 minutes on one spot, followed by at least a short move to the surrounding area.
For a first session, use the lower end of that range. Try 30 to 60 seconds on the target area, then move the rollers up or down by 1 to 3 inches and compare the sensation. This gives you focused coverage without repeatedly pressing the same tissue in the same way.
| User experience level | Suggested spot time | What to do next |
|---|---|---|
| New user | 30–60 seconds | Move away from the area and reassess |
| Occasional user | 60–90 seconds | Shift 1–3 inches and reduce intensity if needed |
| Experienced user | Up to 2 minutes | Stop if pressure becomes sharp, hot, numb, or unpleasant |
Many chairs have default timers around 15 minutes, but that does not mean one area should receive all 15 minutes. Treat the total timer as the session limit and the spot timer as the local limit.
After the session, give the area time before repeating. If the same spot feels more sensitive later, use a gentler setting next time or avoid direct contact there.
How to adjust pressure using a 1-to-5 comfort scale
A good targeted setting should feel controlled. Use a simple 1-to-5 comfort scale: 1 is barely noticeable, 2 is light, 3 is comfortably firm, 4 is strong but still acceptable, and 5 is too much. For manual and spot modes, most people should stay around 2 or 3, especially when the rollers are not traveling far.
Pressure is not controlled by intensity buttons alone. Recline angle, body weight distribution, roller style, air compression, heat, and padding all change the feel. If the chair has 3D or 4D-style roller depth controls, reduce depth before you reduce everything else. If it uses fixed-depth rollers, change the recline angle or add a folded towel between your body and the backrest for a softer feel.
Ways to make contact feel gentler
- Return the chair closer to upright by 5 to 15 degrees.
- Lower roller intensity or roller depth if available.
- Turn off tapping or percussion-style motions and use kneading or rolling instead.
- Reduce or turn off air compression around the shoulders, arms, calves, or feet.
- Place a thin towel behind the target area to soften contact.
- Shorten spot time to 30 seconds.
Ways to make contact feel more focused without overdoing it
- Use manual mode first, then switch to spot mode after placement is accurate.
- Move in 1-inch increments rather than jumping across the back.
- Use a slower roller speed if your chair offers that setting.
- Keep intensity moderate and extend coverage slightly above and below the area.
- Use heat only if it feels comfortable and your physician has not advised against it.
Stop the session if you feel sharp pain, pinching, numbness, tingling, dizziness, shortness of breath, or any sensation that worries you. Do not try to “work through” those signals.
Feature comparison: 2D, 3D, 4D, S-track, and L-track controls
The chair’s roller and track design affects how useful manual and spot modes feel. A basic 2D system usually moves rollers up and down and side to side. A 3D-style system adds in-and-out depth adjustment, which can make targeted work easier to soften or intensify. Some 4D-style systems add more variation in speed and rhythm, though exact definitions vary by manufacturer.
Track shape matters too. An S-track follows the curve of the back and usually stops near the lower back. An L-track extends under the seat area, often adding contact through the glutes and upper hamstrings. Track lengths vary, but many full-back systems fall roughly in the 30- to 50-inch range depending on chair type and design.
| Feature | What it changes | Why it matters in manual or spot mode |
|---|---|---|
| 2D rollers | Up/down and side-to-side movement | Good for basic positioning, but pressure may rely more on recline |
| 3D-style depth | Rollers can move inward and outward | Helpful for reducing pressure on one spot without moving away |
| 4D-style variation | Adds speed or rhythm changes, depending on design | Can feel more dynamic, but should still be used at moderate settings |
| S-track | Follows the back’s curve | Often works well for neck, shoulder, mid-back, and lower-back targeting |
| L-track | Extends into the seat area | Useful if you want manual control into the glute area as well as the back |
| Roller width control | Changes how far apart rollers sit | Wider settings may feel better across the upper back; narrower settings may feel more focused |
Do not assume the most advanced-sounding roller system is automatically best for targeted use. The better question is whether the controls let you lower intensity quickly, move rollers precisely, and stop the session easily.
How to choose and measure for better targeting in 3 steps
If you are shopping for a chair or trying to understand the one you already own, measure the user and the room before judging the controls. Targeting works best when the chair fits your height, shoulder position, and available recline space. Many full-size chairs need roughly 2 to 6 inches of wall clearance in a space-saving design, while non-space-saving chairs may require more.
Step 1: Check user fit
Look for stated height and weight ranges in the owner’s manual. Then compare them with the main users in the home. If a chair’s scan places the rollers too high or too low, manual controls can help, but only to a point. Shorter users may need a head pillow repositioned or removed; taller users should confirm that the rollers reach the upper shoulders comfortably.
Step 2: Measure shoulder-to-seat distance
While seated against a wall, measure from the seat surface to the top of the shoulders. This gives a practical reference for where the rollers need to reach. If two users differ by 6 inches or more in torso height, test how easily the chair adjusts between them.
Step 3: Check control access and visibility
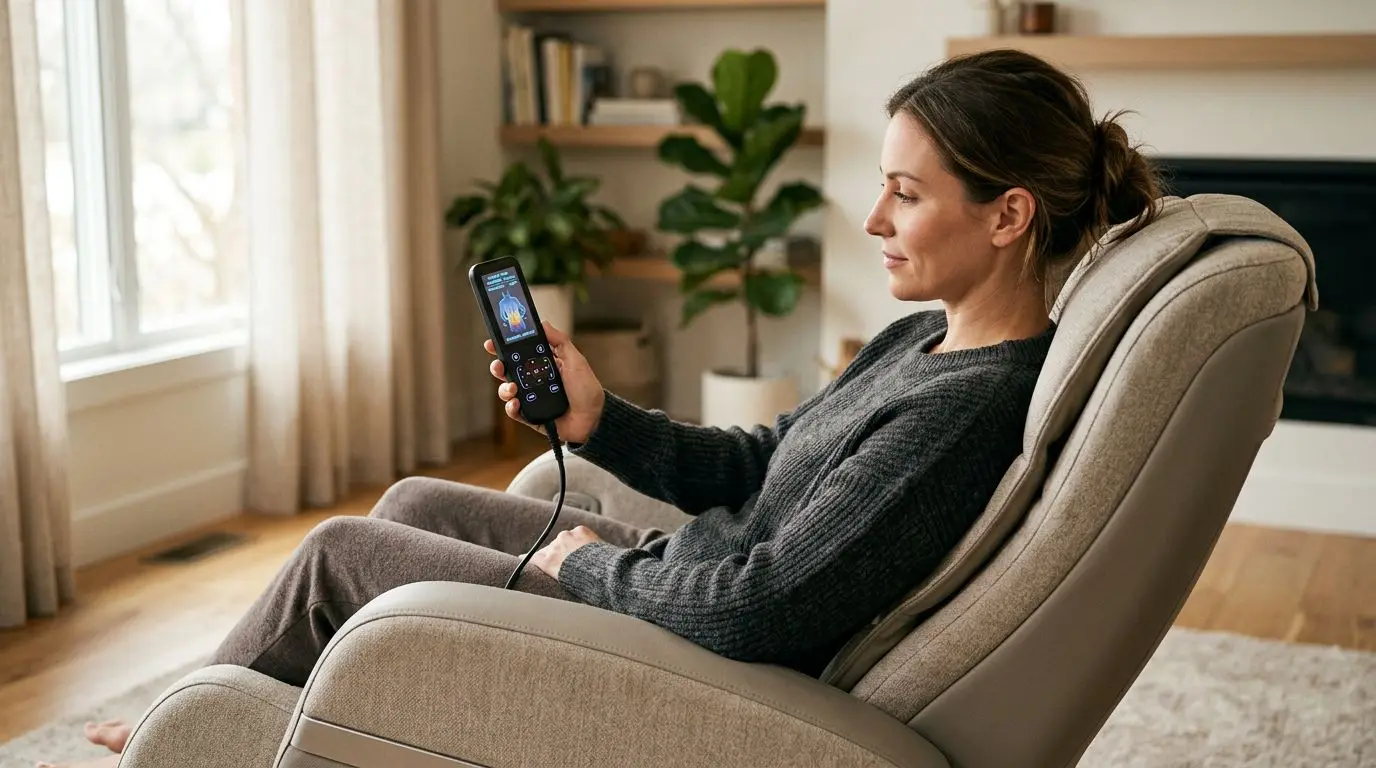
Manual and spot modes are only helpful if you can operate them without guessing. Look for clear up/down roller buttons, an easy stop button, visible intensity levels, and a timer you can understand at a glance. If the remote or side panel is confusing during a showroom test, it may be more frustrating at home.
| What to measure or test | Useful target | Why it matters |
|---|---|---|
| Wall clearance | Often 2–6 inches for space-saving designs; verify the manual | Enough room allows full recline without hitting the wall |
| Torso height | Seat to top of shoulders | Helps judge whether rollers reach the right areas |
| Spot adjustment | Small up/down moves | Better precision for focused contact |
| Stop control | One obvious button | Important when pressure feels too strong |
A 12-minute targeted routine for common tight-feeling areas
This sample routine keeps the session controlled and avoids parking the rollers too long in one place. Adjust the timing down if you are new to manual controls or if the chair feels intense even at low settings.
Minutes 0–2: Warm up in a broad zone
Start with manual rolling or gentle kneading across the general area. For upper-back focus, let the rollers travel from the tops of the shoulders to the middle of the back. For lower-back focus, stay above the pelvis and avoid forcing the rollers into an uncomfortable angle.
Minutes 2–5: Narrow the zone
Reduce the travel range if your chair allows it. Move the rollers in small increments until the contact feels centered. Keep intensity around 2 or 3 on the 1-to-5 comfort scale.
Minutes 5–7: Use short spot intervals
Switch to spot mode for 30 to 60 seconds. Then move the rollers 1 to 3 inches above or below the area and repeat once if it still feels comfortable. Do not spend the full 2 minutes on the same exact point during your first few tries.
Minutes 7–10: Return to motion
Go back to manual mode and let the rollers move through the surrounding area. This usually feels more balanced than ending on a fixed spot.
Minutes 10–12: Lower intensity and finish
Reduce roller depth, speed, or recline. Turn off extra air compression if it makes the session feel busy. Sit upright for a minute before standing, especially if you used a deep recline.
You can use the same structure for the neck and shoulders, mid-back, or low back, but keep the controls conservative near bony areas. If a position feels like direct pressure on the spine rather than the muscles beside it, move the rollers slightly left, right, up, or down if your chair allows, or stop that setting.
5 common mistakes when using spot mode
Spot mode is simple, but it is easy to misuse because the rollers feel more intense when they stop traveling. Watch for these five common errors.
- Staying too long on one point. Keep most spot intervals under 2 minutes, and start with 30 to 60 seconds.
- Using maximum intensity too soon. A fixed roller at level 5 can feel very different from moving rollers at level 5.
- Ignoring recline angle. A deeper recline can place more body weight into the rollers.
- Stacking too many features. Heat, air compression, foot rollers, and strong back rollers may be more than you want for a targeted session.
- Chasing perfect placement. Being within 1 or 2 inches is usually enough; micro-adjusting for several minutes can make the session feel frustrating.
The goal is not to force the chair to mimic hands. It is to use the controls the chair actually has: roller position, motion style, width, speed, depth, recline, and time.
FAQ: manual and spot massage modes in 5 practical answers
Can I use spot mode every day?
Many people use massage chairs regularly, but daily spot mode on the same exact area may feel too intense. Keep the first few sessions short, vary the roller position, and stop if the area feels more sensitive afterward.
Should spot mode hurt to be effective?
No. The sensation should feel firm, controlled, and tolerable. Sharp pain, pinching, numbness, tingling, or discomfort that makes you tense up is a sign to reduce intensity, move the rollers, or stop.
Is manual mode better than an auto program?
Not always. Auto programs are easier for general use because they spread contact across larger areas over 10 to 20 minutes. Manual mode is better when you want to control roller location, motion, and pressure more precisely.
How do I target the area between my shoulder blades?
Start with upper-back manual mode, sit fully back, and use small up/down adjustments until the rollers are near the inner shoulder blade area. Use a moderate width if available, keep the pressure around 2 or 3 on a 1-to-5 scale, and avoid direct pressure that feels like it is on the spine.
What if the rollers miss my sore spot?
Re-run the body scan if available, adjust your posture, change the recline angle, or use a small towel to alter contact. If the chair still cannot reach the area comfortably, do not force it; use a broader manual setting instead.
Frequently asked questions
Can I use spot mode every day? +
Many people use massage chairs regularly, but daily spot mode on the same exact area may feel too intense. Start with short sessions, vary the roller position, and stop if the area feels more sensitive afterward.
Should spot mode hurt to be effective? +
No. It should feel firm and controlled, not sharp or painful. If you feel pinching, numbness, tingling, dizziness, or discomfort that makes you tense up, reduce intensity, move the rollers, or stop.
How long should I keep the rollers on one spot? +
A practical range is 30 seconds to 2 minutes on one spot. New users should start with 30 to 60 seconds, then move the rollers 1 to 3 inches before deciding whether to continue.
Is manual mode better than an auto program? +
Manual mode is better for controlling roller position, motion, and pressure. Auto programs are better for easy, general sessions because they spread contact across larger areas over a preset time.
What if the rollers do not line up with my sore area? +
Try re-running the body scan, sitting fully back, changing the recline angle, or moving the rollers in small increments. If the chair still cannot reach the area comfortably, use a broader manual zone instead of forcing spot mode.
Related guides
When to Use Manual Massage Chair Settings Instead of Auto Programs
14 min read
How to Adjust Massage Chair Intensity Without Overdoing It
13 min read
How to Use a Massage Chair for Lower Back Tightness
13 min read
Massage Chair Routine for Neck and Shoulder Tension: Settings to Try Before Increasing Intensity
16 min read
Full-Body vs. Targeted Massage Chair Programs: When to Use Each Type
14 min read