Disclosure: We may earn a commission when you buy through links on this page, at no extra cost to you. We buy nothing, sell nothing and accept no payment for coverage — commissions never decide what we recommend. How we make money.
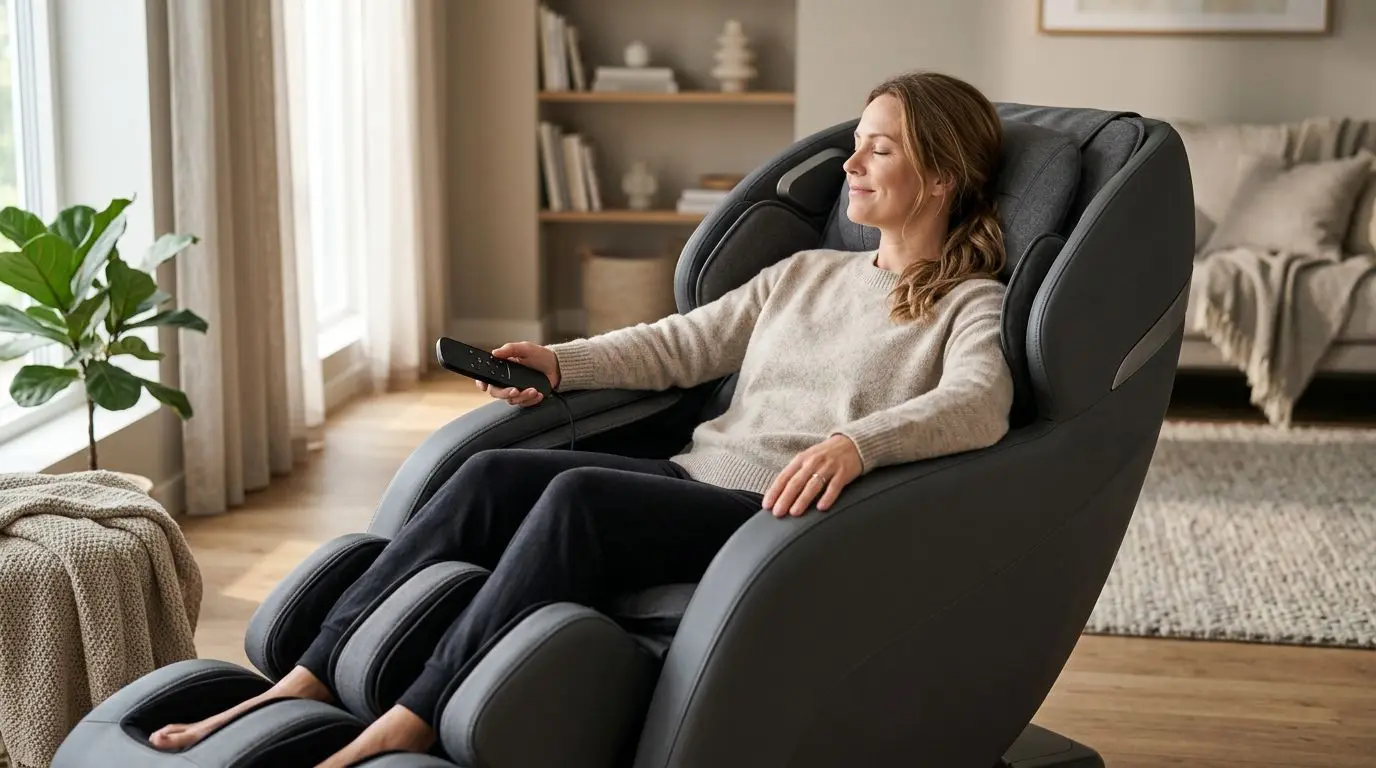
For neck and shoulder tension, begin with a low-intensity 15- to 20-minute massage chair routine that uses careful roller positioning, a moderate recline, optional heat, and brief manual adjustments before you add force. The goal is not to “power through” tight spots. It is to make the chair feel accurately placed, evenly supportive, and comfortable enough that your shoulders can stop bracing against the rollers.
A good first routine is simple: scan or manually set shoulder height, recline slightly, warm the back if heat feels pleasant, use kneading or a gentle combination mode around the upper back, then finish with light neck coverage instead of aggressive pressure. If any setting causes sharp pain, tingling, numbness, dizziness, or pressure on the front or sides of the neck, stop and choose a gentler setup or skip that area.
Before you start: 6 safety checks that matter
A massage chair is a consumer wellness product, not a medical device. It is built to provide pressure, movement, warmth, and a relaxing seated experience; it is not a substitute for medical care or professional evaluation. That distinction matters most when discomfort is new, severe, one-sided, or tied to an injury.
Ask your physician before using a massage chair if you are pregnant; have a pacemaker or other implanted cardiac device; have a history of blood clots or take anticoagulants; have osteoporosis; recently had a fracture, surgery, or spinal procedure; have spinal disc problems; have neuropathy or reduced sensation; or have uncontrolled hypertension. These are not minor footnotes. They can change whether mechanical pressure, heat, vibration, or a deep reclined position is appropriate for you.
Start with a conservative time limit. Many chairs default to 15 or 20 minutes, which is a reasonable ceiling for a neck-and-shoulder session. If you are new to the chair, try 10 minutes the first time and wait until later in the day before deciding whether longer sessions feel good to you.
- Stop immediately for sharp pain, numbness, pins and needles, dizziness, nausea, or headache.
- Keep pressure off the front of the neck and throat. Rollers should stay behind the neck or across the upper shoulders, depending on chair design.
- Do not use heat if your skin sensation is reduced or if you cannot reliably feel temperature.
- Avoid falling asleep in a deep recline, especially with heat on.
- Do not use the chair after alcohol or sedating medication unless your physician has said it is safe for you.
- Read the chair’s manual for weight limits, height range, and any warnings specific to its roller system.
Who it’s best for: 4 common neck-and-shoulder situations
This routine is best for people who feel general upper-back, shoulder, or base-of-neck tightness after desk work, driving, light exercise, household chores, or long periods of looking down at a phone. It is especially useful when the chair has adjustable shoulder height, manual roller positioning, intensity levels, heat, and a recline angle that can be changed in small steps.
It is not the right approach for sudden severe pain, pain after a fall or crash, unexplained weakness, radiating symptoms down the arm, chest discomfort, fever, or symptoms that are getting worse. In those cases, do not try to “test” the area with stronger chair settings. Contact a qualified medical professional.
| Situation | Chair setup to try first | Why it may feel better |
|---|---|---|
| Desk work tightness after 6–8 hours sitting | Low intensity, upper-back kneading, 15 minutes | Broad movement across the shoulder area without sharp pressure |
| Shoulders feel raised or guarded | Slight recline, no deep roller pressure at first | Back support can reduce the urge to brace against the chair |
| Base-of-neck pressure feels too pointed | Move rollers 1–2 inches lower if manual position is available | Places contact more on the upper trapezius area than directly at the skull base |
| Heat feels comforting but pressure feels strong | Heat on, intensity low, airbags gentle or off | Warmth can make the session feel softer without adding force |
People with very sensitive necks often do better by focusing on the upper back and shoulders rather than chasing direct neck pressure. It may sound indirect, but it is a practical comfort strategy: larger muscles around the shoulder blades usually tolerate rollers better than the smaller areas near the neck.
A 20-minute neck-and-shoulder routine to try first
Use this as a starting point, not a rule. If your chair has only preset programs, choose the gentlest upper-body or relaxation-style program and adjust the recline, heat, and intensity manually if the controls allow it. If your chair has manual modes, the sequence below gives you more control.
| Time | Setting | What to do | What it should feel like |
|---|---|---|---|
| 0–2 minutes | Body scan or shoulder height setup | Sit fully back and let the chair map you, or set the shoulder point manually | Rollers line up near the top of the shoulders, not pressing into the skull |
| 2–5 minutes | Gentle recline | Recline to a supported angle, often around 110–130 degrees | Your head, ribs, and pelvis feel supported without sliding |
| 5–8 minutes | Low intensity upper-back kneading | Keep rollers around the shoulder blades and upper back | Broad, rhythmic pressure rather than poking |
| 8–12 minutes | Optional heat | Use low or standard back heat if it feels pleasant | Warm, not hot; no skin discomfort |
| 12–16 minutes | Manual spot or zone work | Hold rollers near the upper shoulders for 30–60 seconds at a time | Focused pressure that stays tolerable |
| 16–20 minutes | Cool-down with light rolling or low airbags | Return to a gentle mode and reduce compression | Easy, even contact before you stand up |
Do not begin with the strongest deep-tissue-style mode just because your shoulders feel tense. Strong pressure can make you tighten up, which defeats the purpose of the session. A better test is whether you can breathe normally, keep your jaw unclenched, and let your shoulders rest heavily against the backrest.
If the first 20-minute session feels like too much, shorten it to 10 minutes next time. If it feels comfortable, keep the same intensity for several sessions before increasing pressure. More force is only one adjustment; better positioning usually matters more.
Set the roller position within 1–2 inches of the right spot
Roller position is the biggest reason a neck-and-shoulder session feels either helpful or wrong. A difference of 1 or 2 inches can change the sensation from broad shoulder pressure to a jab at the base of the skull. Start with placement before touching the intensity button.
Most full-size massage chairs use a body scan to estimate shoulder height. Sit the way you want to be massaged: hips back, spine against the pad, head resting naturally, and feet placed as the chair instructs. If you slouch during the scan and then sit taller afterward, the rollers may end up too low or too high.
If your chair allows shoulder height correction, adjust it slowly. Rollers for neck-and-shoulder work should generally contact the upper shoulders and the back of the neck area, not the sides of the neck or throat. For many users, placing the top working point slightly below the base of the skull feels more controlled than placing it at the highest possible setting.
Use manual zone controls before stronger pressure
Manual zone or spot controls are useful because they let you keep the rollers in a safer-feeling area. Try a 30-second hold near the upper trapezius area, then move the rollers slightly lower toward the shoulder blades. If one location feels sharp, move away from it; do not raise the intensity to “break through” the sensation.
People with narrow shoulders, very broad shoulders, or a shorter torso may need more experimenting. If the chair was designed for a wide height range, the scan is still an estimate. A towel placed behind the upper back can sometimes change the contact angle, but use caution: added padding also changes how your body sits in the chair and can interfere with roller placement. Never add thick padding in a way that jams your neck forward.
Choose the recline angle: 110–130 degrees before zero-gravity depth
Recline changes pressure. The farther back you go, the more body weight may rest into the back rollers, depending on chair design. For neck and shoulders, a moderate recline of roughly 110 to 130 degrees is often easier to control than a fully reclined position.
Zero-gravity-style positions can feel excellent for some users because the body is supported and the legs are elevated. For others, a deep recline increases pressure at the upper back or changes where the head meets the headrest. If your neck feels compressed, return to a more upright angle.
A simple rule: adjust recline before intensity. If rollers feel too sharp, raise the backrest slightly or reduce the recline. If the rollers barely make contact, recline a little more or sit more fully back. The correct angle is the one where pressure feels broad and steady, not the one that looks most advanced on the control panel.
Check head and shoulder contact
Your head should be supported without being pushed forward. If the pillow is removable or adjustable, try one session with it in place and one session with it folded back, but keep intensity low during the comparison. A small change in head support can shift pressure through the neck and shoulders.
Shoulders should not float away from the backrest. If they do, the rollers may feel as though they are chasing you instead of contacting you evenly. Lower the recline, relax the arms, and let the back pad support you before judging the program.
Use heat for 5–10 minutes, not as a reason to go harder
Heat can make a session feel gentler and more comfortable, especially when the chair warms the upper back or lumbar area. Use it conservatively at first: 5 to 10 minutes is enough to learn whether you like the sensation. Warm is the goal; hot is not.
Do not combine high heat, maximum intensity, and a long session the first time. If you feel overheated or sore later, that combination makes it harder to know which setting caused the discomfort. Change one variable at a time.
Heat placement varies. Some chairs warm the lower back only, some warm the full back area, and some include heated rollers or shoulder-area warmth. If your main concern is neck-and-shoulder tension but the heat is located lower, you can still use it for general comfort while keeping the roller work focused up top.
- Start with heat off for the first 3–5 minutes if you are testing roller position.
- Turn heat on once the rollers feel correctly placed.
- Turn heat off if your skin feels too warm, itchy, or irritated.
- Skip heat if you have reduced sensation unless your physician says it is appropriate.
Heat is a comfort feature. Treat it that way. It should support a calmer-feeling routine, not encourage longer or more aggressive use.
Pick gentler modes before increasing intensity from level 1 to 5
Many chairs offer 3 to 5 intensity levels, and some offer more. Start at level 1 or the lowest available setting, even if you usually prefer firm pressure from a person. Mechanical rollers feel different because they repeat the same path and pressure pattern.
Mode matters as much as intensity. Rolling can feel broad and mild. Kneading can feel rhythmic and more targeted. Tapping or percussion can feel stimulating and may be too sharp around the neck for some users. Shiatsu-style modes can feel focused and strong, especially near bony areas.
| Feature or mode | Usually feels like | Try before increasing intensity | Use caution when |
|---|---|---|---|
| Rolling | Long, broad passes | Good first test for contact and track fit | Rollers hit the skull base or spine sharply |
| Kneading | Circular pressure | Use low speed near upper shoulders | Pressure feels pinchy or one-sided |
| Tapping or percussion | Quick pulses | Try on upper back before neck area | You are sensitive to vibration or jolting sensations |
| Airbags | Compression around shoulders, arms, or seat | Set to low or turn off while testing rollers | Compression makes you tense your shoulders |
| Heat | Steady warmth | Use 5–10 minutes at a comfortable level | Skin sensation is reduced or warmth feels excessive |
If the chair has speed and width adjustments, try those before increasing intensity too. A slower speed can make pressure easier to predict. A wider roller setting across the upper back may feel less pointed than a narrow setting, especially for people who dislike direct spine-adjacent pressure.
One practical test is the “next-day rule.” If you feel overly sore or irritated later that day or the next morning, go shorter, lighter, or more general next time. Do not stack stronger settings on top of an already intense experience.
How to choose and how to measure: 3 fit checks before buying or using
Fit determines whether a chair can place pressure where you want it. Before you rely on a neck-and-shoulder routine, check three measurements: your height, shoulder height while seated, and room clearance. These do not need to be perfect down to the fraction of an inch, but they should be close enough for the chair’s stated range and your available space.
First, compare your height with the chair’s user range in the manual. Many full-size chairs are designed around a broad adult range, but the details vary. Someone at the shorter or taller end may find that neck rollers land too high or too low, even when the rest of the chair feels fine.
Second, measure seated shoulder height. Sit against a wall on a firm chair with feet flat. Measure from the seat surface to the top of the shoulder, near the point where the neck slopes into the shoulder. This gives you a real number to compare with how the rollers scan and where the chair’s shoulder position feels best.
Third, check clearance. Some chairs need only a few inches from the wall when reclining, while others need much more. Measure the path of the backrest and footrest, not just the upright footprint. A chair that barely fits may force you to use a recline angle that is not comfortable for neck-and-shoulder work.
| Fit item | How to check it | Why it matters for neck and shoulders |
|---|---|---|
| User height range | Compare your height with the manual | Affects whether the scan can find shoulder height |
| Seated shoulder height | Measure seat to top of shoulder in inches | Helps you judge if rollers land too high or low |
| Track type | Look for S-track, L-track, or SL-track description | Changes how far rollers travel beyond the back |
| Wall clearance | Measure rear and footrest space during recline | Lets you use the angle that feels best |
| Weight limit | Check the manual’s stated maximum | Protects the chair mechanism and keeps positioning consistent |
Track design also changes the experience. An S-track follows the curve of the back and is often focused on the neck-to-lower-back path. An L-track extends under the seat. An SL-track combines a curved back path with extended coverage into the glute area. For a neck-and-shoulder routine, scan accuracy, shoulder-height adjustment, and upper-back roller feel are usually more important than how far the track travels below the seat.
Troubleshooting: 7 adjustments when the chair feels too intense
If the chair feels too strong, do not assume the only options are quitting or enduring it. Small setup changes can reduce the sensation quickly. Try one change, wait 30 to 60 seconds, then decide whether you need another.
- Raise the backrest slightly. A less reclined position can reduce how much body weight presses into the rollers.
- Move rollers lower by 1–2 inches. Pressure that feels sharp at the neck may feel broader across the upper shoulders.
- Turn off airbags. Shoulder or arm compression can make some users brace, which makes roller pressure feel harsher.
- Use a broader mode. Rolling often feels less pointed than focused kneading or tapping.
- Reduce speed. Slower movement may feel more predictable and less jarring.
- Replace the pillow or pad. If the chair includes removable padding, using it can soften roller contact.
- Shorten the session. Ten comfortable minutes are better than 20 minutes spent tightening up.
If the chair feels uneven, rescan your body. Empty pockets, a tilted pelvis, crossed legs, or sitting off-center can all affect roller contact. Sit squarely, keep both shoulders back, and let the scan finish before moving.
If the neck area never feels right, focus the chair on the upper back and shoulders instead. Not every chair-and-body combination delivers comfortable direct neck contact. A routine can still be useful when it avoids the most sensitive spot and works around it with gentler coverage.
When to increase intensity: wait at least 3 sessions
Give a gentle setup at least 3 sessions before deciding it is too light, unless it feels clearly inadequate and fully comfortable. This gives you time to judge roller placement, recline, heat, and mode separately. Increasing intensity on the first try can mask a fit problem.
When you do increase pressure, change only one setting. Move from level 1 to level 2, add a short 30-second spot hold, or recline slightly deeper. Do not do all three at once. The goal is to find the smallest change that improves the feel without making you tense up.
A useful comfort scale is 1 to 10. Stay around a 4 to 6 for neck-and-shoulder work: noticeable, steady, and easy to breathe through. If you are at a 7 or higher, especially near the neck, back off. Stronger is not automatically better, and discomfort is not proof that the chair is doing more.
End each session slowly. Sit upright for a minute before standing, especially after a reclined program. Drink water if you are thirsty, stretch gently if it feels natural, and note which settings worked. A simple note such as “low kneading, heat 8 minutes, recline halfway, shoulder height minus one” is more useful than relying on memory.
FAQ: 5 neck-and-shoulder massage chair questions
Should I use the strongest setting for tight shoulders?
No. Start with the lowest intensity and correct the roller position, recline, and mode first. Strong settings can make you brace against the chair, which often makes the session feel harsher rather than better.
Where should the rollers hit for neck-and-shoulder tension?
They should generally contact the upper shoulders and back of the neck area, not the throat, sides of the neck, or a sharp point at the skull base. If the chair allows manual positioning, move in small 1- to 2-inch changes.
Is heat necessary?
No. Heat is optional. If it feels pleasant, try it for 5 to 10 minutes at a comfortable level, but skip it if your skin sensation is reduced or if warmth feels irritating.
How long should a session be?
Many chairs default to 15 or 20 minutes. For a first neck-and-shoulder routine, 10 to 20 minutes is enough. Shorten the session if pressure feels too strong or you feel sore later.
What if my chair’s neck rollers do not line up?
Rescan while sitting squarely, adjust shoulder height if available, and try a different recline angle. If direct neck contact still feels wrong, focus on the upper back and shoulders instead of forcing the neck setting.
Frequently asked questions
Should I use the strongest massage chair setting for tight shoulders? +
No. Start with the lowest intensity and adjust roller position, recline, and mode first. Strong pressure can make you brace against the chair and may feel harsher.
Where should neck and shoulder rollers make contact? +
They should generally contact the upper shoulders and back of the neck area, not the throat, sides of the neck, or a sharp point at the base of the skull.
How long should a neck-and-shoulder massage chair session last? +
For a first routine, 10 to 20 minutes is enough. Many chairs default to 15 or 20 minutes, but shorter sessions are better if the pressure feels intense.
Should I use heat with a neck-and-shoulder routine? +
Heat is optional. If it feels comfortable, try 5 to 10 minutes. Skip heat if you have reduced skin sensation or if warmth feels irritating.
What should I do if the chair’s neck rollers do not line up? +
Rescan while sitting squarely, adjust shoulder height if available, and try a different recline angle. If direct neck contact still feels wrong, use upper-back and shoulder coverage instead.
Related guides
Can a Massage Chair Help with Neck and Shoulder Tension?
14 min read
Can a Massage Chair Help With Tension Headaches? Neck, Shoulder, and Relaxation Factors to Consider
12 min read
How to Use Manual and Spot Massage Modes to Target Sore Areas
14 min read
How to Use a Massage Chair at Home: A Simple First-Week Routine for Comfort and Consistency
10 min read
How to Use a Massage Chair for Lower Back Tightness
13 min read